Showing posts with label Living. Show all posts

Tuesday, September 9, 2014

Cracking the code for perfect multi-grain bread


Fulfilling my desire for fresh, moist, chewy, multigrain bread with a good crust has not been easy these past 6 years. My efforts have been thwarted by multiple limitations in our local reality. Even though Niterói is a pretty big city (about 500,000 people) and we sit just across the bay from Rio de Janeiro, the variety of fresh breads found in local bakeries is pretty limited. None of the bakeries near me are making anything like what I have in mind.

The typical Brazilian so-called French style “pãozinho” (little bread) and its cousin the longer baguette are wonderful if you like pure white flour, super light and airy interiors with a thin, delicate outer crust. Many bakeries do an outstanding job of making these little, delicately crusted, bread clouds – and they are very popular.  Forgive me if I prefer a heartier, whole wheat chew in my bread. And when I desire white flour bread I prefer it more Italian-style with a firm texture and a thick, almost burnt crust.


Finding satisfying bread has been a bit of a conundrum.

Back in the early 1980s I lived in a hip(py) vegetarian housing co-op in Lansing, Michigan. We made all our own bread (and yogurt, and tempeh, and granola). So I am no stranger to making bread. I understand that bread dough is alive and must be kept that way, treated with kindness, until placed in the oven. Unlike the precise chemistry in cake baking, I know there is some room to play with the proportions of ingredients in breads, and that gluten is generally your friend (apologies to those who are intolerant).

Just after college, during that year of wondering what came next, I worked the night shift in a family-owned Italian bakery. We made hundreds of dozens of dinner rolls, baguettes, various loaves and various specialty breads nightly.

These are the experiences, both personal and professional, that I have brought to my task of unlocking the secrets of successfully making bread in my home here in Brazil.


Bread making with locally available ingredients and in my little Easy-Bake Oven, however, has been a journey.

In my experience, the obstacles to success pretty much come down to two things: the flour here has a low protein count (which means it is low in gluten) and a typical, basic, household oven cannot muster up the necessary heat to get a good crusty crust. But I have finally overcome these obstacles and am sharing my “solutions” in this post.

A note on my oven: we have your basic stove appliance found all over the country in typical homes. It heats with gas and sells for about R$600. It is a four burner, so some would see it as an “apartment” size stove and strive for a 5 or 6 burner model for larger families. But in reality, most families are stone broke, so this is about as much stove as they can afford.

Here's my oven, with some dough put to rise. Note I use a hang-on thermometer. The oven dial does not include temperature markings (not that I would trust them anyway).

As is true with so many things here, while it may not be fancy, it does the job. Well, in this case, the job of boiling or frying on the stovetop. But it just doesn't get hot enough in the oven to make things like a toasted, blistered pizza crust or a crispy bread loaf. There are definitely more robust options on the market, but they tend to be much larger in size (thus not fitting in our kitchen) and have larger price tags (thus not fitting in our budget). As it stands, I am set on developing strategies for making our oven work rather than living beyond our means.

Join me down here in regular people Brazil-land for some tips on getting a decent sandwich loaf of multi-grain wheat bread from your run of the mill oven. I think I have worked it out.

So the two things I want in my breads (correlated to the above mentioned obstacles) is a good texture/shape and a crispy crust.

The way I have worked out the crispy crust thing is to (wait for it) just let it go. It’s not gonna happen. I can force a hard baked crust, but only by over cooking the loaf. I've tried splashing water into an iron pan pre-heated on the bottom of the oven when putting the bread in. But the steam it creates that is supposed to moisten and then crisp the crust just manages to extinguish the oven flame and cut the heat altogether. Spritzing water onto the surface of the loaf to coax a crust just produces a soggy mess that eventually cooks, but never crusts. The oven is never hot enough. Ah well – I’m just letting go… no homemade crispy crust bread out of my oven. Sigh. Moving on…

I have figured out the whole texture and “structural integrity” thing; the gluten problem. The texture of my multi-grain bread rocks!


After some serious searching, plus the repeated education of a local natural foods store manager encouraging him to sell gluten, I can now buy “farinha de gluten” (gluten flour, or ‘vital gluten’) to then add to my locally available flours to increase the gluten content sufficient to create the texture I need. I have never seen so-called “bread flour” on the shelves here at grocery stores.

There is a nearby Italian bakery/sandwich/dessert shop that sells imported “type 00” flour, which is essentially bread flour with a higher protein content – perfect for pizza dough – but it is a bit expensive. If you can find this imported “type 00” flour in your area, it is a solution in and of itself if you are just using it (with little to no whole wheat or other flours added).


So to make that perfect loaf here’s what you do. First, get your hands on farinha de gluten (not “farinha com gluten” that is just regular flour with a kick of gluten added - not the same). You will be adding about 5 – 6 teaspoons of gluten to the flour of each loaf (4 teaspoons if you’re just using white flour). Second, and just as important, is to add an “autolyse” step into your mixing process.

An autolyse (in bread making) refers to a resting period just after the initial mixing of water and flour (and in our case the added gluten) that gives the mixture time to hydrate. This step ramps up the development of gluten (which depends on water) as well as allows time for the flours to “self-digest” (break down a bit), making the whole-grain dough less tacky to work with and ultimately light and chewy rather than tough.

The solution is in the biology and chemistry. Yay science!

Enough already – here is the recipe.

Multi-grain Sandwich Bread
This recipe is a modified version of one perfected by the cooks/food scientists over at Cooks Illustrated. It was by reading their materials that I learned about the value of an autolyse process, for which I am grateful.

Makes one large loaf. Feel free to double the recipe – I cut the original recipe in half because Luiz and I rarely have use for two large loaves at any one time.

Ingredients
¾ cup (150 g) multi-grain mix (explained below)
1 cup (200 ml) warm water
1 ½ cups (225 g) white flour
¾ cup (100 g) whole wheat flour
5 teaspoons gluten (vital gluten or trigo de gluten)
3 Tablespoons molasses (melaço or “melado”) or honey (mel)
2 Tablespoons unsalted butter, melted (or you can use canola or soy oil)
2 teaspoons (5 g) active dry yeast (fermento biológico seco instantâneo)
1 teaspoon salt
½ cup seeds, like sunflower or sesame (optional)

Procedure


To make the multi-grain mix I use a couple of tablespoons each: pearled barley (cevada, or “cevadinha”), wheat berries (trigo em grão), whole oats (aveia) and bulgur/cracked wheat (trigo para kibe). You can use whatever grains you like. (If I could find them I would use soy grits and buckwheat groats rather than the barley and cracked wheat. But I have not seen these here.) Boil the wheat berries and barley for about 35 minutes, or until tender. Then add the oats for a couple minutes, then the cracked wheat. Remove from heat and let it sit a few minutes. It should be a cooked but chewy mix. Measure out your ¾ cup portion. Eat the rest with yogurt and a banana for breakfast. J
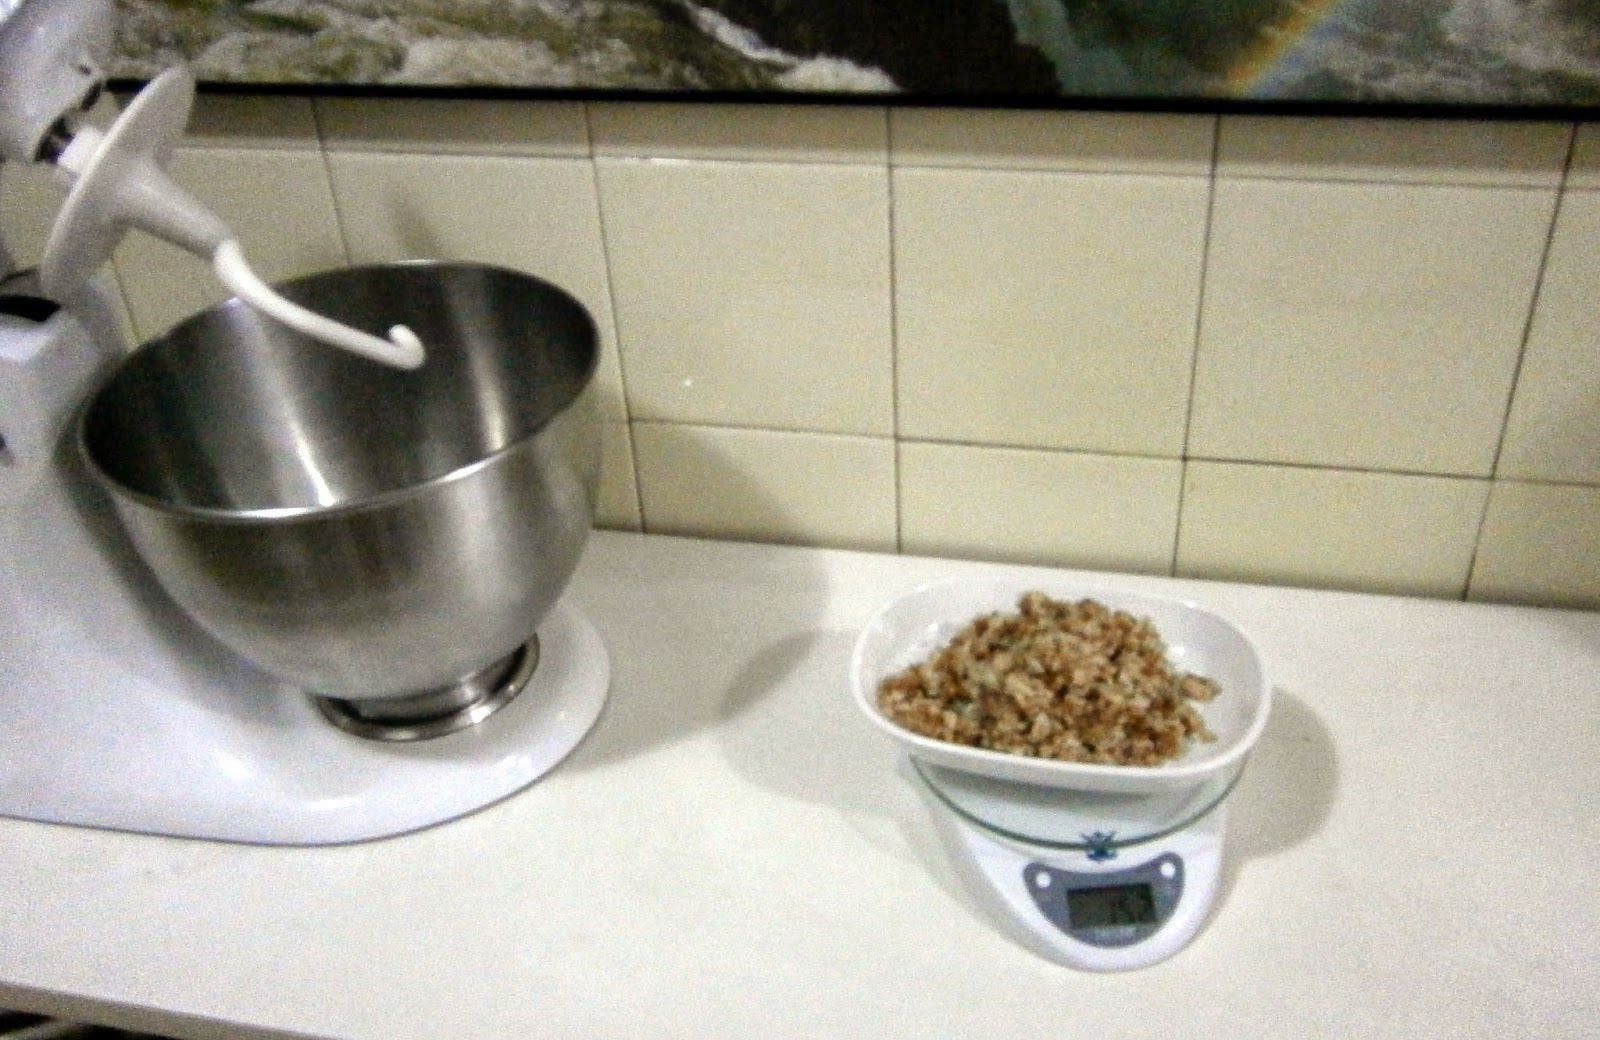

Place the prepared grain mix, water, sweetener and oil in the mixing bowl of your Kitchen Aid [I hope you have one. Or any strong stand mixer. Luckily I brought my 25 year old workhorse from the States. Without a machine to help you, prepare to knead by hand a good 15 minutes or longer. Longer kneading is also part of the success.]. Be sure it is not too hot. Then stir in the yeast and let sit for 5 – 8 minutes until the awakened yeast is foamy.


Meanwhile, sift together your flours and gluten. Feel free to experiment with other tasty flours you have been missing since you moved here. Do NOT add the salt just yet. It retards the yeast, so we will add it later.


When the wet mixture is nice an foamy, using the dough hook, slowly mix in the flour mixture. Mix it up until well combined, about 2 minutes, but don’t lean in to the kneading process. Cover the bowl with plastic wrap (I just wrap a tea towel around the stand mixer) and let it sit for 20 minutes. This is the autolyse step I described earlier. Don’t rush this. Let it do its magic.


Now add the salt and knead on medium speed until the still-wet dough clears the sides of the bowl, about 4 minutes. You will surely need to add more flour to help stiffen the dough, but don’t go crazy. I like to keep the dough a little more sticky than seems intuitive. But you may find yourself adding a bunch of flour (a little at a time). Just go for it and try not to overdo it.

When the dough seems about right (still sticky looking) continue to knead for 5 more minutes. Depending on the random turning motion of your dough ball in the mixer you may want to stop and rearrange the dough a couple of times just to be sure you are getting a thorough kneading. Add a bit more flour as needed (so to speak).

Once everything is perfect, transfer the dough to a floured surface and carefully knead in the seeds. Remember the dough is still alive and relying on you to treat it with care until you place it into the oven. Do not force yourself on it, tearing up the dough. Be gentle, but firm.


Form the dough into a taut ball and place it into a large slightly oiled bowl. Cover lightly and allow to rise, away from any drafts, until doubled in size; about an hour.

Go do other stuff: make the bed, check your Facebook, do the laundry, lay in a hammock and listen to Yo-Yo Ma on your iPod, whatever… Good bread takes time.


Adjust your oven rack to the middle position. Heat oven to 375 degrees F (180 C). If you are using a bread pan, grease it slightly. If you are going for the country-style big round loaf I suggest you put a pizza stone or a super large clay pot into the oven and preheat it along with the oven itself. The stone/clay helpers MUST be preheated. Do not pre-soak the clay pot as you might have read in regards to other recipes. That’s a different thing. Here we are using the pot to not just help create a dry crisp bottom on the loaf, but also to help preserve the heat in the oven when you open it to put the loaf in. Every degree counts!

If you are going with the big clay pot, prepare a large sheet of parchment (papel manteiga) on a cooking tray, dusted with cornmeal (fuba). Set aside. No need for the parchment if you are using a flat pizza stone. Just dust a pan to rest the dough on to rise.


Transfer your risen dough to a lightly floured surface and punch it down (gently). If you are going with the loaf pan, fold it over itself (in thirds) and pat it into a rectangle suitable in size to fit into the pan.  (At this point you can also roll the dough in oats for that all-over oats look. But I find the oats I get are too tough.) Gently place it into the pan, cover lightly and let it rise again until almost doubled, maybe 30+ minutes.


For the round loaf gently fold the dough over and then shape it into a ball, tucking the sides under and pressing up into the center. Pull into a firm ball but take care not to rip the dough. Place the ball onto the center of the prepared, dusted parchment paper. Cover and let rise until almost doubled.


This second rising is critical, but you also do not want to “over proof” the dough, so even though you may get hypnotized by the magic of your rising loaf, don’t let it rise for an hour or longer. It will reach for the sky, but also probably over reach and then collapse when you handle it or when it gets placed into the oven. You want height AND firm structural integrity. It should be big, but not squishy - puffy - fragile.


Now either place your pan into the oven or carefully transfer your dough onto the pizza stone, or gently lift your parchment carpet with even tension and place it into the preheated clay pot – quickly placing it in the oven. Keep that Easy-Bake Oven door closed as much as possible so as not to lose valuable heat.


Bake until internal temperature registers 200 degrees F (about 95 C), about 30 - 40 minutes. You should have a nice brown crust. Do not over bake. Longer might get you a darker crust, but it will also get you a thicker crust and a dryer loaf. Remove from pan/pot and cool on a wire rack before slicing.

This bread has such terrific texture you can slice really thin slices and it holds together nicely.


It works for me. Let me know how it goes for you. Your advice and tips are appreciated.

Wednesday, April 30, 2014

Brazil is changing before my eyes

As I remember it.

My first visit to Brazil was in 1999. Luiz and I had met early in the year in San Francisco, CA and he soon thereafter began encouraging me to buy a plane ticket to Rio to join him on the beach in Copacabana on NYE for the millennial fireworks. Tempting as it was I was hesitant to lock in a plane ticket months in advance for a trip with a guy I was not sure I would still want to be spending time with. Little did I know Luiz has an instinct for these sorts of things. I’m glad I secured a seat on that plane.

Brazil has changed a lot in the past 14+ years. Some of the things that enamored me with the country at first blush have since faded into history, like the relative lawlessness in everyday life and the liberty that it provided. But also, some of the things that have begun to fade into history have been met with relief, like the relative lawlessness in everyday life that is better suited to a vacation than a daily living situation.

The town matriarch's house is closed up now.

Luiz and I spent this past long Easter weekend with friends in one of our favorite nearby mountain villages: Boa Esperança. I can’t say for sure, but I think the year-round resident population is something like a few hundred, if you also include the dogs, horses and VW Beetles. As tiny and remote as it is, Boa Esperança has certainly changed in recent years.

Dora and Sergão have upgraded their rental from a teeny tiny place to this beautiful three bedroom palace.

It’s not a big thing (well, maybe it is). Not too much has changed. But you can definitely feel change/progress/lost simplicity in the air.

The old dirt road is history.
Now the road is paved. But the air continues to be crystal clear.

Local residents are happy about the recent paving of the road up from neighboring Lumiar. The asphalt now extends all the way to the final intersection in town (although it does not branch outward onto intersecting residential roads). At least now the bus can reach its turnaround point without herniating the spinal disks of its passengers. This is a great improvement if you live there. For us occasional visitors it has removed some of the romance.


The waterfall on private land a good 1,000 meters up the mountain beyond the end of the pavement has morphed into a more developed family picnic spot. Gone are the days of calling out a hello to the owner and his wife when entering, swimming alone in the waterfall, and then being among just your friends and a few additional folks back in the picnic area. Now there is a full-on bar and luncheonette with extensive seating. The newly improved cement path that steeply descends from the access road to the property helps you not rip apart another pair of flip flops. But, unfortunately, now there is a young man sitting at a plastic patio table at the bottom ready to collect a R$3 entrance fee. I don’t blame the family for commercializing their hidden treasure. It is a good idea and it was bound to happen.


I just miss how it used to be. Sappy, I know.

Our decision to move to Brazil 6 years ago was rooted in family obligations, a desire for a lifestyle change, and plain ol’ whimsical adventurousness. The simpler nature of much of the Brazil we have chosen to surround ourselves with has been a balm on many levels. I get it that time rolls along and things progress. Far be it for me to dismiss the very real improvements in people’s lives that things like paved roads, nearby health clinics or internet access provide. I’m generally pro-development.

At least the banana trees are still giving bananas the good old fashion way.

A lot can be written about the changes I have seen these past 14 years through my significantly narrow experience since we became full time residents. Perhaps this post will elicit from me a longer essay on just that topic. At this point let it suffice to say that Luiz and I choose to surround ourselves with the better nature of rural communities, focus on our relationships with friends who share our values, and live in the present, resisting the temptation to surge ahead into a new Brazil that we fear will come to look all too much like the US we left behind.

Thursday, February 13, 2014

Adventures of a care package from the States


There are few pleasures as joyful as getting a care package from a friend or family member filled with the stuff you want, really want, or the stuff that’s simply impossible to find where you currently are. Sometimes it is just the idea of a care package that soothes the soul. Oh, a box filled with your favorite things…

It is often the case for many an expat here in Brazil that the emotionally comforting box also promises to save you a bundle of money. Getting any sort of electronics, baby items, specialty bath items, or even some simple kitchen zip lock bags can mean cost savings easily into the hundreds of $Reais over having to purchase them locally.

But – as any expat in Brazil will tell you: care packages are more easily dreamt of than realized. Finding an ally in the States to pack it and make a trip to the post office; paying the crazy expensive shipping fees; passing through customs without being slapped with ridiculous import taxes; or even just seeing a fully realized delivery in an understandable length of time -- believe me, there are bumps in the road in the life of a care package.


Several months ago my beloved iPod Shuffle bit the dust. Luiz had encouraged me to buy a backup Shuffle when we were in Florida last May, but I foolishly ignored his good advice. My iPod is a daily companion while riding busses, standing/sitting in lines, or just going for a walk in the evening. Losing my best electronic friend was motivation enough to try and scare up a care package from the States.

Locally I could buy a replacement 4g Mp3 player (Sandisk) for about R$225 on Mercado Livre, Brazil’s eBay, plus shipping. The same item at Amazon.com goes for $R84, with free shipping within the US. Buying an actual iPod down here would just be stupid expensive… I don’t have a cell phone (by choice), so obviously I cannot use my phone to play Mp3 or Mp4 files.

So I figured I would bundle up some other items Luiz and I would like and leverage it all into a value-filled box of practical and “treat” items. A true care package.

Here’s the story. (Heads up – this is a rather long post. But it is a good one.)

[Note: values in this post are listed in Brazlian reais, not US dollars. I earn and spend reais, so dollar values are really irrelevant. All things considered, residents of the US can just think in terms of dollars and get a feel for the relative costs – i.e. shit is expensive, plus salaries are lower. Unless you earn dollars and are spending in reais, making a currency conversion is misleading. For the record, values here are based on a 1:2.4 exchange rate from dollars to reais.]


In September 2013 I casually inserted an off topic request into a Face Book msg with a dear friend in the States. Actual msgs.:

Me: “Hey - another topic - my iPod died. I went to look at replacements and saw one - super cheapo Chinese-made thing for R$90. Then I looked on Amazon.com and they sell the exact same thing for R$12.”

Unsuspecting friend: “No shit! Really?”

Me: “Any chance I can buy what I want and ship it to you and have you drop it in the mail to me? I could also pull together a short grocery store list. LOL.” Electronics here are shit and STILL stupid expensive.”

Unsuspecting friend: “Sure no problem.”

Me: “Sorry to put you out so much, but there are some shortcomings to being here that get you to lean on family and friends for relief. Thanks.”

Unsuspecting friend: “Happy to help. I love you.”

Hook set.

Feeling only mildly guilty for roping a dear friend into what I knew was going to be more than what she bargained for I went online to shop for a few items and had them shipped to her house. She really does love Luiz and I and she really does have a super huge generous heart. I had my fingers crossed this would go as smoothly as possible. But I had my doubts.


Those of us who live here and have traveled back to the States for a visit know the immediate popularity you receive when others learn of your vacation plans. Phone calls, emails and msgs stream in with lists of items people either casually ask you to bring back for them or quite brashly insist won’t be any trouble for you to buy and bring back on their behalf. This is the kind of favor you agree to do only once. You quickly learn that being a mule for others desperate for a bottle of maple syrup or a new notebook computer is ALWAYS more trouble than it is worth. Transporting things is a favor reserved for those on your short list.

But just putting a box in the mail… simple, right?

Let me see if I can shrink this 4+ month saga into a few paragraphs. Yep. You read that right. 4+ months.

Like I said, not long after my friend agreed to help out I went online and bought an Mp3 player plus five rainbow hot air balloon wind spinners. Luiz brought one of these wind catchers back in May and uses it to grab attention at his flowers booth in the park on the weekends. EVERY weekend people ask him if it is for sale. While it costs R$36 online in the US, he can easily sell it for R$110 here in the park. These would be re-sale items to help pay for the box.


As promised, I sent my friend a short list of items to pick up at the grocery store, plus, as is generally the case, I added a few additional items that would require an extra trip to a housewares store on our behalf. Oops- I was acting like the others I have so little patience for. But I repeated time and again that my friend could say no to anything and that I would be grateful to get just the basics. And there was no time rush. Of course my dear friend was happy to tack more errands onto her personal favor for me. The monster had begun to grow its second head.

Before long I was occupying space in my friend’s garage as the pile of items grew. First in the pile were the items from Amazon.com., then the stuff from the grocery store.

I was hoping the things from the discount housewares store would be fun to shop for (keeping Luiz’s smiling face in mind). We did, in fact, have fun with this. Well, I certainly had fun. I hope the feeling was mutual. It became clear to me that my friend and her partner were embarking on a multi-stop errand morning. They were messaging me photos of fun stuff from various stores along their journey. I was giving the thumbs up or down. It was a virtual shopping adventure at Sam’s Club, HomeGoods and elsewhere from the comfort of my home office. My fingers were crossed that they were not too quickly tiring of the whole affair. I certainly had fun.


The pile in the garage (and another head) grew. Once everything was in hand it was ready to be shipped.
Reality check: none of this was “on the way” in the course of my friends’ lives. Making time to accomplish the shopping, the packing, the shipping… That time had to be carved out from an already hectic and tiring weekly routine. That pile in the garage was not going to get to Brazil on its own. There needed to be packing material, shipping tape, boxes (we decided to go with two smaller boxes over one large one to try and avoid unwanted attention from the Brazilian Customs office), and ultimately time standing in line at the post office. The monster continued to grow heads.


For my part, my emails and FB messages oozed with happy talk and words of thanks and encouragement. As the weeks went by I knew my friend was feeling pressure to get these boxes in the mail and harbored a growing desire to get that damn monkey off her back. I assured her there was no rush. I suggested she forget about the whole thing until after the holidays when life would calm down a bit and the lines at the post office would return to their normal slow-moving selves. Keep breathing. Don’t go sour on me.

As my friend would come to discover, there is a bit of a trick to packing a box for international shipping. To save space it is best to remove extraneous packaging from the original items. Shipping costs are calculated by weight AND size. Protect fragile items. Evenly distribute weight among the boxes.

You could write a book on the tips and tricks for getting your box shipped without drama through Customs. Everyone has their favorite method – or wants to learn yours. Gringos here can tag a hundred replies to a post on Face Book trying to help out a fellow care package dreamer. Do this, don’t do that…
Here’s what we did.

The main issues are postage and avoiding import taxes.


It seems like I've heard stories from all over the spectrum regarding shipping. Some folks swear by UPS for a promised delivery, even though it may cost a little more. UPS is supposed to handle the package right to your door, but I've heard tales of it being plopped into the Brazilian postal service for the final bit. If this is so, it trumps any “strategy” to avoid a grumpy Correio (Brazilian postal service) worker who never really attempts a delivery but just fills out paperwork documenting three attempts to no avail and then sends your package back to the sender.

Some folks swear by Brazil’s postal service, citing international comparisons that place their level of service well above average. So for them going with the US Postal Service who then hands things off to Correio is a fine choice.

Everyone, it seems, has a horror story. Folks talk of waiting months for a completed delivery. Many folks speak of pieces of postage and packages alike disappearing into thin air (the common assumption is that they are snatched up by workers along the way, for whatever reason).

For me, actual cost trumps real or imagined tales of woe. I go with the US Postal Service.


Then there is the concern over if and/or how much the package(s) will be taxed by the Brazilian Customs office for the contents therein. Scary tales of ridiculous taxes assessed on boxes of used clothing and such abound. How do they discern what is in the package? Mostly you tell them by whatever is written on the required Customs Declaration form that gets affixed to the outside of the box. The form requests a “detailed description of contents” and their value. Plus they guesstimate further value if you have paid for extended insurance coverage. And many times if a tax is assessed they will include the cost of shipping when totaling the to-be-taxed value (go figure…). The tax is 60% of the value of most items.

Generally speaking, shipping veterans encourage you to be more general in your description and to try and keep declared values below US$50 to avoid drawing the attention of the tax man. So for example, we chose descriptions like: “kitchen ingredients” and “party decorations” to generally describe most of the items being shipped. If particular items fail to make the inventory, well, sometimes innocent mistakes can happen.

We divided all our items into two boxes so that a smaller value could be declared for each. Shipping costs would go up, but if import taxes were avoided then we would save in the end. General inventories were made and the value of each was kept well below US$50.


As an extra bit of “strategy” to avoid a randomly tired or irritated Customs worker who might be therefore choosing to be especially stern or strict in the execution of their duties, we prominently taped a number of pictures of Jesus, the cross, and some common prayers to most of the surfaces of the boxes. I listen to countless people go on about Jesus, Mary and the Father around here, why not work that to our advantage? Kinda like the survivors on The Walking Dead smearing rotting flesh all over themselves to avoid being seen by the “walker” zombies. Make our packages invisible.


Around the last week of January my by now weary dear friend found her way to the post office to wait in line and finally peel that monkey, now entering adolescence, off her back. At this point we had done all we could to make this whole care package folie à deux a good experience and avoid it turning into a super expensive shipping and tax adventure gone wrong. Everything was in Jesus’ hands, if you will. Note: the postal worker in the States looked at our piously adorned boxes and asked if they were being shipped to a missionary. My friend bit her lip and said “No, we just want the Lord to look after them along the way.” With that the packages were sent. Done. Multi-headed monster slain. (Thank you!!)

To wrap this part up… the shipping time was actually quite surprising. Once they were dropped off at the post office they were dispatched to a sorting facility in another city. The online tracking details reveal that it took 4 days for them to pass through that facility and be sent to Brazil. Seven days later they passed through a sorting facility in Brazil, clearing Customs. The very next day they were both delivered to our door by noon. Just 12 days! Record time.

Plus, there were NO TAXES applied to our care packages. Whoo hoo!! Big score. Thank you Jesus!

Now – to run the math. Was this whole rigamarole worth it? The willingness on the part of our dear friend and her partner to help us out was simply priceless. That value cannot be put into the equation. But I can give you a general idea about content values and overall expenses.

Our total shipping costs were R$396 (about US$165). That seems like a high bar to get over to recoup a savings on items shipped. But don’t forget, we are talking about Brazil. Shit is expensive here.

The money we saved over just three items: the Mp3 player, a single 120 count bottle of 1,500 mg glucosamine dietary supplement caplets, and a collection of 12 boutique bath soaps MORE than paid for the shipping. The Mp3 player was R$141 cheaper in the States. The supplements were an unbelievable R$304 cheaper. And the soaps were about R$125 cheaper. Everything else was gravy. And a valuable gravy at that.


Opening the care package was like Christmas in February. In addition to things already mentioned there was stuff for Luiz’s flower design activities, Thai curries for me in the kitchen, other beloved spices and extracts, and more. Yeah!

All in all it is a process worth doing, if only once. But be careful. And hope for some luck. If we had been hit with import taxes this whole tale would have had a sour ending. Be creative. Buy a Christian wall calendar and use the images… hahaha.

If you are a dear friend back in the country of origin of your good buddy abroad – have a heart. Be patient with us. We really, really appreciate the extra effort it requires to make a care package happen. And if you are coming for a visit, consider bringing an extra piece of luggage – care package express.


Thursday, October 31, 2013

Making Bahian-style moqueca in a clay pot


Few meals excite me as much as a seafood moqueca over rice with a tasty pirão. Include a fresh salad and I will think (no, I will know) I have died and gone to heaven. If everything is cooked in clay or stone pots it most certainly inspires a blog post.

A couple weeks ago I met a young neighbor who had never been to Niterói’s remarkable fish market. It always surprises me when I, the gringo new resident, know more about local treasures than folks born and raised here. I guess that is not all too surprising. Some of our friends who have lived here all their lives have never been to Sugarloaf or Corcovado in Rio. To be fair, I lived in San Francisco for more than 8 years before I finally visited Alcatraz Island (and then only when taking a tourist friend to see the place).

At any rate, I used my recent craving for a mouth watering moqueca as an opportunity to show my new friend what he has been missing in terms of quality fresh seafood at discount prices available only at the São Pedro Fish Market.

Some people like a fish moqueca. Others like a moqueca swimming with plump, flavorful shrimp. Me – I say use them both. If you are going for a full on seafood moqueca you may want to include mussels or clams, and maybe some squid, but for the sake of avoiding local mussels pulled from our polluted bay and the near-certain rubbery squid that would result from over cooking (it is a stew, after all, and squid is super tricky when it comes to cook times), I went with just fish and shrimp. Simple and delicious.

We perused the numerous stands at the market hawking shrimp in various sizes. I bought about ¾ of a kilogram from the cutest fish monger I could spot who was still selling his morning catch of crustaceans at a decent price. I paid R$10 even. They were pretty big little guys. I was happy.

For fish I went with two big steaks of firm flesh dorado, a little less than a kilogram overall. It is best to choose a fish with a firm flesh so that it holds its shape and does not disintegrate when cooking in the stew. I think I paid about R$8 for the fish, total.


Back in my kitchen the first order of business was to shell and de-vein the shrimp. I saved the heads and shells and boiled them up with some chunks of onion, celery, a bay leaf and salt and pepper to get a simple broth I would use later in the pirão.

After looking up a few Bahian-style moqueca recipes online I cross referenced that with what Luiz said he usually does. It’s essentially a fish stew made with coconut milk. You can feel your way around and do what pleases you without really running the risk of ruining anything. Just don’t overcook your seafood and you will be OK.


Here is approximately what I used:

- the fish and shrimp
- a red and a green pepper, sliced into thin rounds
- one large onion, sliced into thin rounds
- several cloves of garlic, crushed
- several tomatoes, seeded, sliced crosswise
- a couple little hot peppers, seeded, chopped fine
- a bunch of cilantro and scallions (cheiro verde), chopped fine-ish
- 400 ml coconut milk
- dendê oil for frying (this is the crucial ingredient for getting that Bahian flavor)

You will also need about a cup of yucca flour (farinha de mandioca) for the pirão.

The stew does not take very long to cook so be at the ready with your ingredients and cooked rice. You may want to fuss over a salad in advance. The pirão is quick and can be made after the moqueca is simmering. Just be mindful that once you add the fish and then the shrimp to the stew you don’t want to cook the crap out of it. Less is more when it comes to cooking fresh seafood.

So here we go.

Prepare your rice the way you like it. Have your shrimp broth strained, hot and at hand.

Luiz likes to marinate the fish and shrimp while working on everything else. So we finely chopped some onions, garlic and cheiro verde and mixed them with some olive oil. Then we tossed the shrimp and fish steaks in this oil mixture and set aside. I think you could skip this step if you are somehow pressed for time, but it is a tasty step.

Pour a couple tablespoons of dendê oil into your clay pot. Keep in mind that the flavor of the oil is quite strong. You want that flavor, just not so much that you overpower everything. Think curry – it tastes great – but a little goes a long way. If you like to drown things in oil for cooking, use half and half with canola oil. Heat the pot and the oil over medium high heat.


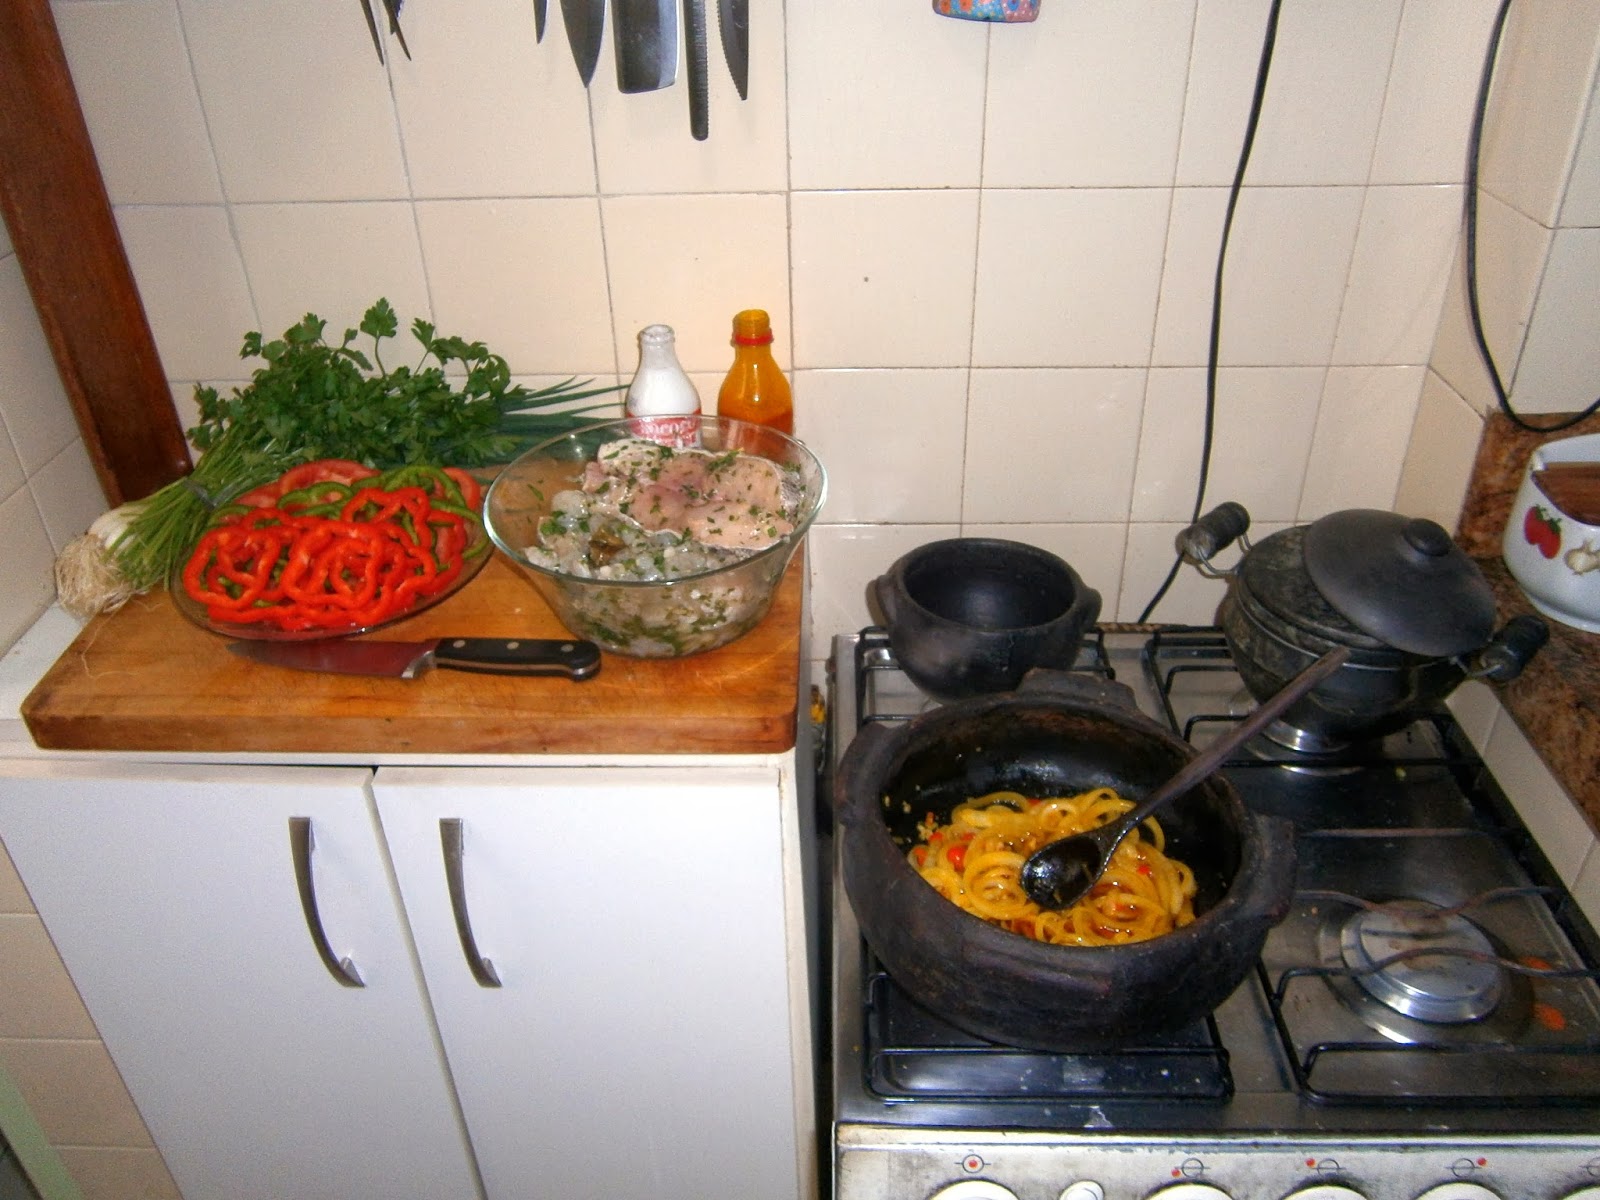
Toss in and sauté up your onions and garlic. Everything will take on the characteristic orange color of the dendê. Things should smell pretty wonderful at this point, taking you back to the streets of Bahia. Reduce heat and add the sliced peppers and chopped chilies. Cook just to soften. Add the coconut milk, about a cup of shrimp broth and the chopped cheiro verde. Salt to your taste. Bring the mixture to near boiling. Gently add the fish steaks and cover with a couple layers of sliced tomatoes. Cover and cook slowly for a few minutes, until the fish is nearly cooked. A few minutes before you are ready to serve, stir in the shrimp. Cover and cook until the shrimp are cooked, but not obliterated.


Scoop out a few ladles of your yummy, fabulous moqueca sauce and add it to about 1.5 cups of the hot shrimp broth. Bring to a boil. While stirring constantly, slowly sprinkle in the yucca flour until you have a thin meal (thinner than polenta). Heat slowly and continue to stir. The mixture will thicken as it cooks. Be careful not to add too much yucca flour or things will get thick and sticky. You want it thin, yet with some texture. For a real treat add a couple chopped up shrimp and some shredded fish from the moqueca. Stir, salt and otherwise correct seasoning to your taste, cover and set aside. It’s ready when you are but don’t delay too long. It continues to thicken over time.

OMG – I’m drooling just typing this. 


Set the table or just call your family to serve themselves from the pots on the stove. Fish and shrimp moqueca, rice, pirão and a bright salad. It doesn't get any better than that!