Showing posts with label Food. Show all posts

Tuesday, September 9, 2014

Cracking the code for perfect multi-grain bread


Fulfilling my desire for fresh, moist, chewy, multigrain bread with a good crust has not been easy these past 6 years. My efforts have been thwarted by multiple limitations in our local reality. Even though Niterói is a pretty big city (about 500,000 people) and we sit just across the bay from Rio de Janeiro, the variety of fresh breads found in local bakeries is pretty limited. None of the bakeries near me are making anything like what I have in mind.

The typical Brazilian so-called French style “pãozinho” (little bread) and its cousin the longer baguette are wonderful if you like pure white flour, super light and airy interiors with a thin, delicate outer crust. Many bakeries do an outstanding job of making these little, delicately crusted, bread clouds – and they are very popular.  Forgive me if I prefer a heartier, whole wheat chew in my bread. And when I desire white flour bread I prefer it more Italian-style with a firm texture and a thick, almost burnt crust.


Finding satisfying bread has been a bit of a conundrum.

Back in the early 1980s I lived in a hip(py) vegetarian housing co-op in Lansing, Michigan. We made all our own bread (and yogurt, and tempeh, and granola). So I am no stranger to making bread. I understand that bread dough is alive and must be kept that way, treated with kindness, until placed in the oven. Unlike the precise chemistry in cake baking, I know there is some room to play with the proportions of ingredients in breads, and that gluten is generally your friend (apologies to those who are intolerant).

Just after college, during that year of wondering what came next, I worked the night shift in a family-owned Italian bakery. We made hundreds of dozens of dinner rolls, baguettes, various loaves and various specialty breads nightly.

These are the experiences, both personal and professional, that I have brought to my task of unlocking the secrets of successfully making bread in my home here in Brazil.


Bread making with locally available ingredients and in my little Easy-Bake Oven, however, has been a journey.

In my experience, the obstacles to success pretty much come down to two things: the flour here has a low protein count (which means it is low in gluten) and a typical, basic, household oven cannot muster up the necessary heat to get a good crusty crust. But I have finally overcome these obstacles and am sharing my “solutions” in this post.

A note on my oven: we have your basic stove appliance found all over the country in typical homes. It heats with gas and sells for about R$600. It is a four burner, so some would see it as an “apartment” size stove and strive for a 5 or 6 burner model for larger families. But in reality, most families are stone broke, so this is about as much stove as they can afford.

Here's my oven, with some dough put to rise. Note I use a hang-on thermometer. The oven dial does not include temperature markings (not that I would trust them anyway).

As is true with so many things here, while it may not be fancy, it does the job. Well, in this case, the job of boiling or frying on the stovetop. But it just doesn't get hot enough in the oven to make things like a toasted, blistered pizza crust or a crispy bread loaf. There are definitely more robust options on the market, but they tend to be much larger in size (thus not fitting in our kitchen) and have larger price tags (thus not fitting in our budget). As it stands, I am set on developing strategies for making our oven work rather than living beyond our means.

Join me down here in regular people Brazil-land for some tips on getting a decent sandwich loaf of multi-grain wheat bread from your run of the mill oven. I think I have worked it out.

So the two things I want in my breads (correlated to the above mentioned obstacles) is a good texture/shape and a crispy crust.

The way I have worked out the crispy crust thing is to (wait for it) just let it go. It’s not gonna happen. I can force a hard baked crust, but only by over cooking the loaf. I've tried splashing water into an iron pan pre-heated on the bottom of the oven when putting the bread in. But the steam it creates that is supposed to moisten and then crisp the crust just manages to extinguish the oven flame and cut the heat altogether. Spritzing water onto the surface of the loaf to coax a crust just produces a soggy mess that eventually cooks, but never crusts. The oven is never hot enough. Ah well – I’m just letting go… no homemade crispy crust bread out of my oven. Sigh. Moving on…

I have figured out the whole texture and “structural integrity” thing; the gluten problem. The texture of my multi-grain bread rocks!


After some serious searching, plus the repeated education of a local natural foods store manager encouraging him to sell gluten, I can now buy “farinha de gluten” (gluten flour, or ‘vital gluten’) to then add to my locally available flours to increase the gluten content sufficient to create the texture I need. I have never seen so-called “bread flour” on the shelves here at grocery stores.

There is a nearby Italian bakery/sandwich/dessert shop that sells imported “type 00” flour, which is essentially bread flour with a higher protein content – perfect for pizza dough – but it is a bit expensive. If you can find this imported “type 00” flour in your area, it is a solution in and of itself if you are just using it (with little to no whole wheat or other flours added).


So to make that perfect loaf here’s what you do. First, get your hands on farinha de gluten (not “farinha com gluten” that is just regular flour with a kick of gluten added - not the same). You will be adding about 5 – 6 teaspoons of gluten to the flour of each loaf (4 teaspoons if you’re just using white flour). Second, and just as important, is to add an “autolyse” step into your mixing process.

An autolyse (in bread making) refers to a resting period just after the initial mixing of water and flour (and in our case the added gluten) that gives the mixture time to hydrate. This step ramps up the development of gluten (which depends on water) as well as allows time for the flours to “self-digest” (break down a bit), making the whole-grain dough less tacky to work with and ultimately light and chewy rather than tough.

The solution is in the biology and chemistry. Yay science!

Enough already – here is the recipe.

Multi-grain Sandwich Bread
This recipe is a modified version of one perfected by the cooks/food scientists over at Cooks Illustrated. It was by reading their materials that I learned about the value of an autolyse process, for which I am grateful.

Makes one large loaf. Feel free to double the recipe – I cut the original recipe in half because Luiz and I rarely have use for two large loaves at any one time.

Ingredients
¾ cup (150 g) multi-grain mix (explained below)
1 cup (200 ml) warm water
1 ½ cups (225 g) white flour
¾ cup (100 g) whole wheat flour
5 teaspoons gluten (vital gluten or trigo de gluten)
3 Tablespoons molasses (melaço or “melado”) or honey (mel)
2 Tablespoons unsalted butter, melted (or you can use canola or soy oil)
2 teaspoons (5 g) active dry yeast (fermento biológico seco instantâneo)
1 teaspoon salt
½ cup seeds, like sunflower or sesame (optional)

Procedure


To make the multi-grain mix I use a couple of tablespoons each: pearled barley (cevada, or “cevadinha”), wheat berries (trigo em grão), whole oats (aveia) and bulgur/cracked wheat (trigo para kibe). You can use whatever grains you like. (If I could find them I would use soy grits and buckwheat groats rather than the barley and cracked wheat. But I have not seen these here.) Boil the wheat berries and barley for about 35 minutes, or until tender. Then add the oats for a couple minutes, then the cracked wheat. Remove from heat and let it sit a few minutes. It should be a cooked but chewy mix. Measure out your ¾ cup portion. Eat the rest with yogurt and a banana for breakfast. J
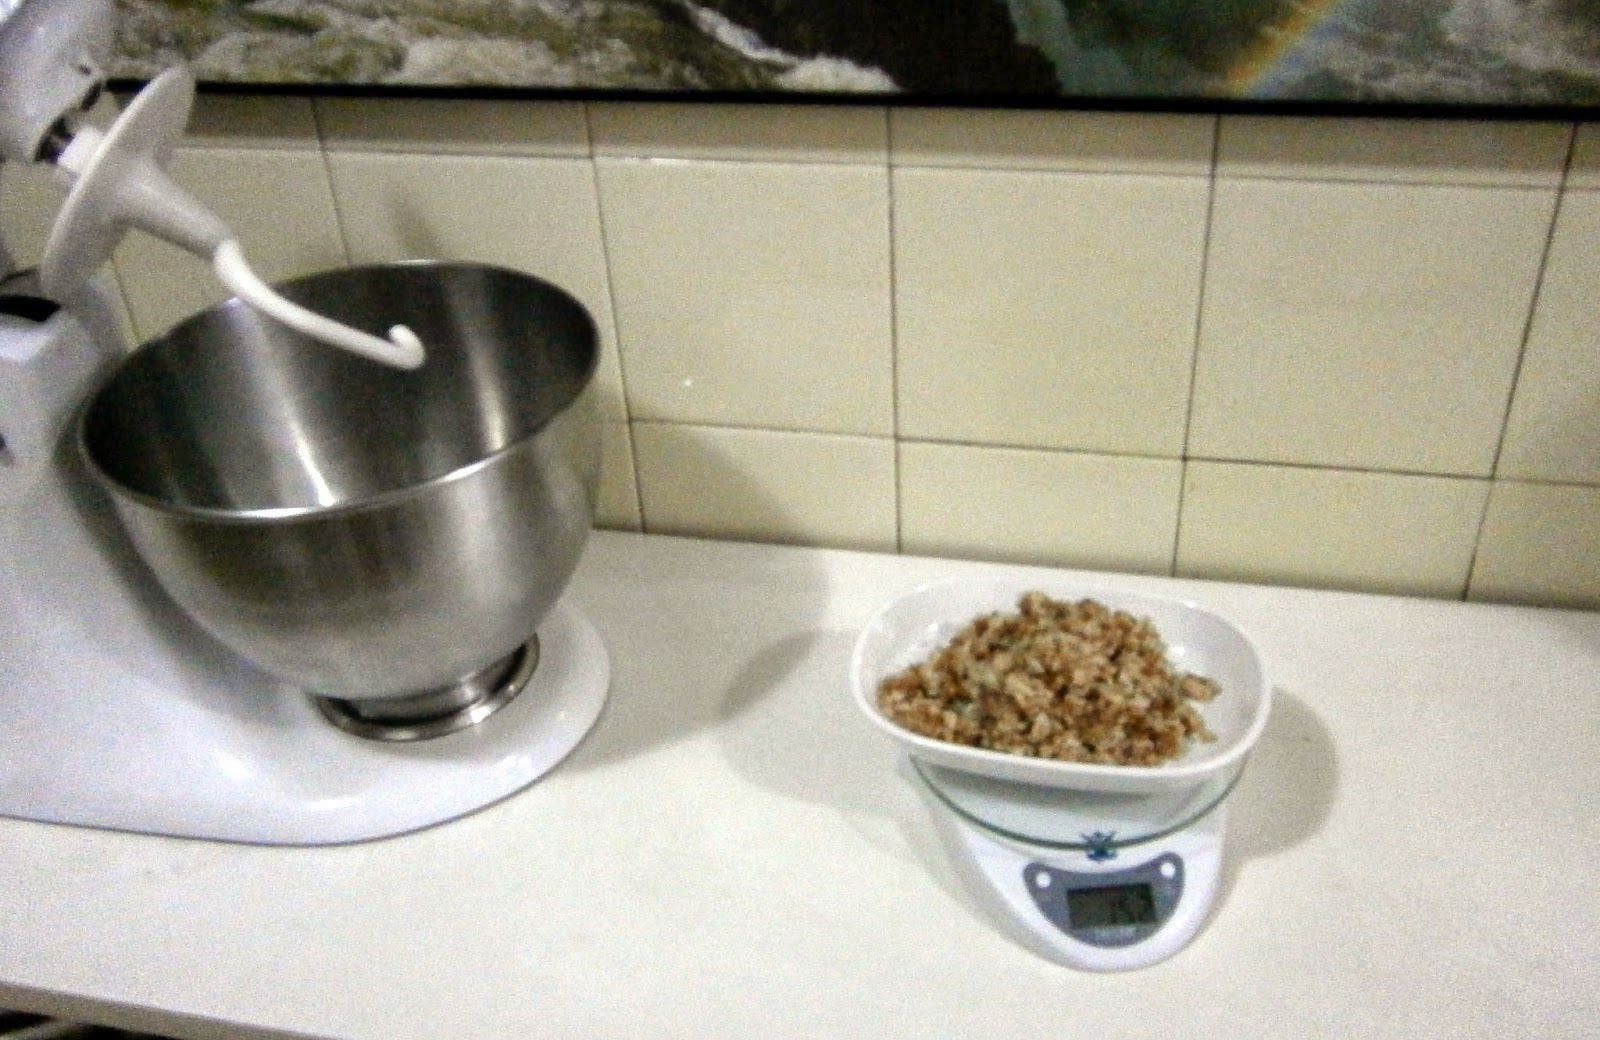

Place the prepared grain mix, water, sweetener and oil in the mixing bowl of your Kitchen Aid [I hope you have one. Or any strong stand mixer. Luckily I brought my 25 year old workhorse from the States. Without a machine to help you, prepare to knead by hand a good 15 minutes or longer. Longer kneading is also part of the success.]. Be sure it is not too hot. Then stir in the yeast and let sit for 5 – 8 minutes until the awakened yeast is foamy.


Meanwhile, sift together your flours and gluten. Feel free to experiment with other tasty flours you have been missing since you moved here. Do NOT add the salt just yet. It retards the yeast, so we will add it later.


When the wet mixture is nice an foamy, using the dough hook, slowly mix in the flour mixture. Mix it up until well combined, about 2 minutes, but don’t lean in to the kneading process. Cover the bowl with plastic wrap (I just wrap a tea towel around the stand mixer) and let it sit for 20 minutes. This is the autolyse step I described earlier. Don’t rush this. Let it do its magic.


Now add the salt and knead on medium speed until the still-wet dough clears the sides of the bowl, about 4 minutes. You will surely need to add more flour to help stiffen the dough, but don’t go crazy. I like to keep the dough a little more sticky than seems intuitive. But you may find yourself adding a bunch of flour (a little at a time). Just go for it and try not to overdo it.

When the dough seems about right (still sticky looking) continue to knead for 5 more minutes. Depending on the random turning motion of your dough ball in the mixer you may want to stop and rearrange the dough a couple of times just to be sure you are getting a thorough kneading. Add a bit more flour as needed (so to speak).

Once everything is perfect, transfer the dough to a floured surface and carefully knead in the seeds. Remember the dough is still alive and relying on you to treat it with care until you place it into the oven. Do not force yourself on it, tearing up the dough. Be gentle, but firm.


Form the dough into a taut ball and place it into a large slightly oiled bowl. Cover lightly and allow to rise, away from any drafts, until doubled in size; about an hour.

Go do other stuff: make the bed, check your Facebook, do the laundry, lay in a hammock and listen to Yo-Yo Ma on your iPod, whatever… Good bread takes time.


Adjust your oven rack to the middle position. Heat oven to 375 degrees F (180 C). If you are using a bread pan, grease it slightly. If you are going for the country-style big round loaf I suggest you put a pizza stone or a super large clay pot into the oven and preheat it along with the oven itself. The stone/clay helpers MUST be preheated. Do not pre-soak the clay pot as you might have read in regards to other recipes. That’s a different thing. Here we are using the pot to not just help create a dry crisp bottom on the loaf, but also to help preserve the heat in the oven when you open it to put the loaf in. Every degree counts!

If you are going with the big clay pot, prepare a large sheet of parchment (papel manteiga) on a cooking tray, dusted with cornmeal (fuba). Set aside. No need for the parchment if you are using a flat pizza stone. Just dust a pan to rest the dough on to rise.


Transfer your risen dough to a lightly floured surface and punch it down (gently). If you are going with the loaf pan, fold it over itself (in thirds) and pat it into a rectangle suitable in size to fit into the pan.  (At this point you can also roll the dough in oats for that all-over oats look. But I find the oats I get are too tough.) Gently place it into the pan, cover lightly and let it rise again until almost doubled, maybe 30+ minutes.


For the round loaf gently fold the dough over and then shape it into a ball, tucking the sides under and pressing up into the center. Pull into a firm ball but take care not to rip the dough. Place the ball onto the center of the prepared, dusted parchment paper. Cover and let rise until almost doubled.


This second rising is critical, but you also do not want to “over proof” the dough, so even though you may get hypnotized by the magic of your rising loaf, don’t let it rise for an hour or longer. It will reach for the sky, but also probably over reach and then collapse when you handle it or when it gets placed into the oven. You want height AND firm structural integrity. It should be big, but not squishy - puffy - fragile.


Now either place your pan into the oven or carefully transfer your dough onto the pizza stone, or gently lift your parchment carpet with even tension and place it into the preheated clay pot – quickly placing it in the oven. Keep that Easy-Bake Oven door closed as much as possible so as not to lose valuable heat.


Bake until internal temperature registers 200 degrees F (about 95 C), about 30 - 40 minutes. You should have a nice brown crust. Do not over bake. Longer might get you a darker crust, but it will also get you a thicker crust and a dryer loaf. Remove from pan/pot and cool on a wire rack before slicing.

This bread has such terrific texture you can slice really thin slices and it holds together nicely.


It works for me. Let me know how it goes for you. Your advice and tips are appreciated.

Saturday, June 14, 2014

Finding fresh heart of palm


Hearts of palm. Yum. I love those little babies. I love them in a clean fresh salad. They are super yummy roasted. Pasteis de Palmito are to die for. Palmitos – just plain yum.

When I first moved here I was excited by the idea of moving so close to the source of this delicious harvest. Palm trees. Brazil has a gazillion palm trees. Heart of palm should be a cheap and abundant yummy treat, right? Uh, yeah, not so much.

Turns out that Brazil was one of the biggest “producers” of palm hearts until the 1990s when the “farmers” realized that they had chopped away at most of the wild supply of suitable palm trees and their supply was dropping precipitously. At that point they had to get into the business of actually farming the plant and managing their harvests. So supply dropped for a while.

My purchase. I had the guy machete the edible center out of the outer layers.

Not all of the freelance palm poachers took to farming. Maybe they are out there snatching up wild açai or illegal song birds, or something. But those that did make the switch have seen things get off to a (normal) slow start. So prices are not so low. Plus, they export the really good stuff. So those of us actually living in palm tree heaven wind up paying a little more for a lesser quality product. Ah Brazil. You sure know how to break a guy’s heart. (Real heart, not the palm heart.)

Once cut out the center oxidizes quickly. Gotta get it into water.

At any rate, I saw a vendor at the street market today selling fresh palm hearts, still in the protective outer layers of non-edible palm-ness. Excited to see it so fresh, and reasonably priced, I bought a stalk.
I paid R$10 for what resulted in about 420 grams of yummy edibleness. That compares to a 300g jar sold for R$9. I saved a little more than R$2, relatively speaking. That 300g jar in the States goes for about US$4.25.

Stop. Stop right there. I see you US Americans doing the conversion in your head and saying to yourself: “So, hmmm, R$9 a jar there is just about the same as R$4.25 a jar here. Not bad…”  NOPE. It doesn't work that way. First, I am not a tourist at my grocery store spending my US earned US dollars on a product priced in Brazilian reais. If I earn my $$ in reais, I spend it in reais. So my R$9 is R$9. Then you have to consider that wages here are generally speaking half of what they are in the States for similar work (worse, most often, but let’s not squabble). So in reality that yummy looking little jar of lesser quality domestic brand hearts of palm is costing me, in very real terms (so to speak), a lot more than you in the States are buying it for.  Bummer. So much for moving to Brazil to get a deal on palm hearts.

How it should look after roasting. Yum.

Ah well. Big deal. The point is – it is yummy! And I got a big piece of it for a good deal today at my local street fruit and veggies market. My plan is to chop up half of it for a salad (and to just munch) – and to oil, salt, pepper, wrap in foil and roast the other half and have it with my dinner.

It was a good day at the market – and tangerines are in season too!

Wednesday, March 26, 2014

Cooking spanakopita 6,000 miles from its home


I am not Greek, although Luiz and I have had the joy of spending a couple of weeks exploring several cities in Greece, as well as several Greek islands in the Mediterranean. I have also been to Greek Cyprus and Luiz and I have been to Turkey as well. While the Greeks and the Turks have not gotten along very well in recent history (given that whole unresolved Turkish invasion of Cyprus thing starting back in the 1970s) they share some common ground in their culinary traditions. But – I don’t want to poke a stick at that sleeping lion. I just want to share my recent adventure cooking spanakopita, a delicious spinach pie that I have eaten in various forms over many years and in many countries. This time – in Brazil.

Cooking ethnic foods at home is an ongoing theme among expats in Brazil. So many of us have cravings for international dishes that we just can’t find in restaurants. (Those living in São Paulo have better luck in this regard.) About a week ago I was combing the aisles of Pão de Açúcar, a high-end supermarket near our apartment, looking for Sriracha hot sauce. I didn't find the hot sauce but I did spot phyllo dough (or philo, or filo; fillo in Portuguese) in the freezer section. Eureka!

Living the strategy of getting while the getting is good, I bought a box and started dreaming up the possibilities.

I still use the cookbook I bought in the early 1980s. I've had to put it into a binder but she still gives me what I need.

Spanakopita was the obvious choice. I’ve got a super delicious recipe I learned over 30 years ago and have been pleasing crowds with ever since. Time to break it out and introduce some folks to a Greek favorite.


Like I said, I am not Greek. My recipe, which I LOVE, is not one passed down to me by someone’s Greek grandmother nor was it coaxed out of a family restaurant chef after a three hour meal with new friends on the Greek island of Samos. This gem of a recipe is a proven fabulous Greek spinach pie suitable as a main dish published in the Moosewood Cookbook (plus my personal tweaks). Given the realities of shopping in Niterói I had to make a few modifications. But the end result was just as I remembered it and EVERYONE loved it.

Here we go. Heads up – you will need a pastry brush to get the job done.

This recipe takes about 1.5 hours to prepare (incl. baking) and makes 8 adult servings as a main dish. It is a generous, “double-decker” pie. It could be halved, made in a single layer, and be served as a side.


Ingredients:

- 2 cups (about 275g) crumbled feta cheese. [I have only once seen feta cheese in a store in Niterói and it was sold in a tiny quantity packaged as a crumbled salad topping. Price prohibitive. Others in Rio have had better luck and mention Apetina feta made by Arla (imported) as an affordable and tasty option when it can be found in finer grocery stores. It runs about R$95 per kilogram. The less affordable Brazilian-made feta runs more than R$225/kilo. So – no surprise here – I substitute a firm but smooth ricotta. Choose wisely. Some Brazilian ricottas can be very dry and firm beyond what is right for this recipe. Pick a ricotta that gives a bit when you gently squeeze it.]
- 5 medium eggs, slightly beaten
- 2 Tbs. flour (as needed, to help make a dryer filling mixture)
- 3 Tbs. butter for sautéing
- 1.5 cups chopped onions
- 1.5 cups chopped fresh mushrooms (I know, nobody puts mushrooms in their spanakopita… but I do.) Cremini would be great if you can find them. I cannot. So I used shitake.
- 3 cloves garlic, minced
- 2 cups cottage cheese (500g)
- one bunch of scallions, chopped
- 2 lbs. fresh spinach (1 kilogram) Frankly, you could double the spinach and it would still look like too little after you gently steam it down. I err on the side of going overboard. It is a spinach pie after all, not a cottage cheese and feta/ricotta pie. But there is the cleaning and stemming thing you have to deal with. So just make sure you use at least the minimum. Note to the cooks in Brazil – I’m sure you have noticed the spinach here can be significantly tougher than what you may have had elsewhere. That means you really do want to remove the stems. So if you are buying handy bags of ‘cleaned’ spinach (which here is another silly over statement) you want to go through it and pinch off those tough stems.
- Some fresh basil, chopped [I also added some chopped mint, not too much, to bring a bit of zing. I was worried the lack of feta was going to make things too bland.]
- ½ tsp. oregano
- 1/4 tsp. nutmeg (my secret ingredient when making things like this with ricotta)
- Salt and pepper to taste [Note: I added a bit more salt than usual because I did not have the salt in the filling coming from the feta. Be sure to taste.]
- 1/8  cup sesame seeds (25g or so)
- 1 lb package of phyllo dough, defrosted – Note that the package I found was a 300g quantity, so you will need two of them. More about this early mistake on my part later…
- 1.5 lb melted butter (a 200g pkg will do the trick) for assembly

Procedure:

Preheat your oven to 375° F (190° C or more depending on your oven)


Clean, stem and tear or chop the spinach. Salt it slightly and cook it, adding no additional water, for just a few minutes to wilt it. This is brief. Do not cook it down to a dull green mush. Let it cool some and then squeeze out the excess liquid. Carefully fluff it back to individual bits of spinach (do not leave it in clumps).

Sauté the onions and garlic in butter, salting lightly. Add the chopped mushrooms and cook minimally, but get their wonderfulness into the mix. When it looks and smells perfect remove from heat and combine with the rest of the ingredients. Add the fluffed up spinach. Stir lovingly.

See how that spinach cooks down dramatically?
Mix it all together.

So now you have a big bowl with the sautéed stuff, the spinach, the cheeses, beaten eggs, herbs and spices all mixed together and ready to go. Taste it and correct the seasoning to your preferences.

Here’s my pep talk regarding the use of phyllo dough: Be brave. Be confident. Don’t freak out. It’s all gonna be OK. This stuff looks like a pain (and it is, a little) but it is not as delicate as it looks. It can take a little manhandling. Yeah, it can tear a little and straight-out-of-the-box dried edges which were not your fault can make your job harder than it should have been. Just put on some music, pour yourself some wine, and take it all in stride. Ultimately, in terms of the final product, this dough is VERY forgiving. The layers can be a mess, but with just one intact leaf on top you have a picture perfect spanakopita. How you got there can be your little secret. And who knows – maybe you will get a really cooperative batch and sail through the whole procedure glitch free. It happens.

After your dough has returned to room temperature, open the package and unfold the sheets/leaves of dough so you have one stack. Lightly and evenly wet a tea towel squeezing out all the water. This is your humidifier that is going to keep your dough from drying out while you assemble this amazing pie. Place the towel over the stack of dough leaves when you are not otherwise fiddling with them. If your towel is too wet and you fear it will add moisture to the dough place a sheet of parchment paper (papel manteiga will do) over the stack first, then the towel.

Arrange your work space so the dough, the melted butter and brush, your filling, the 9x13 baking pan and your wine are all close at hand. Breathe. You can do this.


Brush some melted butter on the bottom of your pan. Place one leaf of the dough, centered, in the pan. It will outsize the pan, just let it climb the sides. Brush this layer of dough with butter, including up the sides of the pan. Repeat this placing of layers and spreading with melted butter until you have 6 or 8 layers down. I say 6 or 8 because you want to use a little more than 1/3 of them on the bottom, then the same amount in the middle and then a few less for the final, top layer. So if you are having trouble with the dough and have had to scrap a leaf of so – don’t panic, just adjust your number of layers so as to keep enough to complete the task.


When your first set of dough leaves is complete spread ½ of the luscious filling all around. Continue with another 8 or so layers of dough. Don’t skimp on the melted butter and don’t worry about the corners that are now getting a little crowded with pleated dough – they are going to be the super-buttery areas of the pie for those who like that sort of thing.

Sometimes the dough will begin to tear when you try to separate one sheet. This is usually because it hits a dry spot/edge or a spot where one layer has been pressed too firmly into the other and they are stuck together. Stop pulling immediately and try to work around the spot from various angles to free it. Tears will only continue and get worse once they start. If separating the layers is impossible without things tearing into two or more pieces – no sweat. Just remove the sheet in bits and reconstruct the sheet in your baking pan. Spread it with butter, sip your wine, and carry on. No harm done.

After your second set of leaves spread the remaining filling over the whole thing. Continue placing layers of dough and butter until you have three sheets left. IMPORTANT: that last one or two layers in the stack are probably NOT going to be flawless. They have been offering up their perfectness to the benefit of the entire stack since the factory. By now they are likely to be a little worse for wear. So – remember I suggested you save a perfect leaf for the top? Plan ahead, because it is not likely to be your last leaf in the stack.

Ready to bake.

When you are about three or four layers from the end, carefully fold over all that excess dough you have spilling out over the top/edge of the pan. Use your butter brush to wet it down. Now use your last few perfect leaves to delicately finish off the pie. Trim to the outside pan size if necessary. Brush butter over the whole top and sprinkle evenly with sesame seeds.

Place the pan into your preheated oven and bake for about 45 minutes – until golden.

Smile. Sip your wine. You did it.


My particular tale this time around, on the other hand, took a bit of a left turn halfway through. Not noticing that the box of phyllo dough contained only 300g and seeing as I bought only one package, I had only enough dough to make one layer of the pie. It’s all good – one layer is probably more common a format anyway, plus my Brazilian friends and family didn't know the difference. But I was stuck with ½ of my filling mixture.

So I returned to the store the next day and bought another package of the dough. This time I made those cute little spanakopita triangles you have probably seen at cocktail parties. Easy-peasy.


Just pull off one leaf of the dough, cut it into three strips, brush the dough with butter, place a small spoon of the filling off to one side at the end of a strip and then fold in triangles like a flag. Place on a baking sheet, brush the tops with butter and bake for about 20 minutes. It’s a little bit of work – but they are so cute! And they taste just as wonderful as the whole pie version.


In addition to those I baked immediately, I put 8 triangles in two layers separated by parchment paper into Ziplock bags and placed them in the freezer for later use.


There you have it. Let me know what you think. Tell me your secret tips for success with phyllo dough. And definitely give this a try on your own.

Wednesday, March 12, 2014

Carnaval adventure in Ouro Preto

Spectacular Ouro Preto

Each year in Brazil Carnaval comes around and takes many cities by storm. Communities come alive with pride and tradition. Musicians hit the streets. Youth enjoy the sanctioned excuse to drink. Drag queens (and their wannabe secret admirers) dust off colorful aging separates and concoct new fabulous outfits. And most of all, in places like Rio, businesses and politicians alike roll out the red carpet for visiting tourists seeking an over-the-top bucket list party extravaganza, preferably in English.

The main event in Rio.

Rio’s Carnaval scene has been evolving over the years. The world famous Carnaval parade has continued to expand while still staying anchored in neighborhood pride and local competitive determination. The neighborhood street party (or bloco) scene has seen a serious resurgence of late with this year’s calendar sporting more than 500 separate events all over the city. This year in particular it appeared that restaurants were test driving their spiffy new English language dinner menus as a prelude to the upcoming World Cup crush.

It’s all good.

Praça Tiradentes in Ouro Preto.

This time around Luiz and I found ourselves seeking an out of town alternative to Rio’s big event after learning that many among our group of friends with which we typically take in the big parade at the Sambadrome were going either to the States to do some shopping or to visit family in distant cities. So we returned to Ouro Preto (OP).


Ouro Preto, an historic, colonial, mountain town of less than 80,000 people, is rather famous nowadays for its raucous city-wide Carnaval celebration. The party starts in earnest on Saturday and continues every night through Tuesday. The local municipality sponsors several live music stages throughout the historic district offering a variety of musical styles for every taste. Every night the streets are PACKED with people coming out to let loose for a while and just have some fun.

A big driver behind the crowds is the fact that Ouro Preto is a significant university town. In 1969 two highly respected and long standing institutions: the School of Pharmacy of Ouro Preto, founded in 1839, and School of Mines of Ouro Preto, founded in 1876, were merged to form the Federal University of Ouro Preto.  Today it is one of the most respected universities in the state and the country. And that university comes with A LOT of college kids ready to party.


To further froth up the mix, there are a good number of “Republicas” (much like fraternity houses) throughout the city occupying large residential buildings which get a temporary make-over for Carnaval to host thousands of visiting young people. Some of these Republicas have begun to sponsor their own ticketed weekend events complete with serious sound systems and endless flowing alcohol. If the drunken college scene really turns you off you may want to reconsider your plans for Carnaval in Ouro Preto. There are definitely ways to steer clear (mostly) of the worst of it, but the reality is that the city-wide event is most definitely geared toward this scene.

The view from Carlinhos and Du's sala window.

At any rate, we went to spend some time with our good friends Carlinhos and Du, who live in OP. They’ve got a big apartment with an even bigger view – and it is nowhere near a raucous Republica. They were (again) hosting a crowd from Belo Horizontes. To our delight, Luiz and I rated a bedroom and real bed, in contrast to so many others sleeping on inflatable mattresses on the floors of other bedrooms and a living room. Lucky us.


The weekend was filed with bountiful Minas breakfasts, noisy group chatter, afternoon cooking marathons, naps, costume changes and repeated visits into the heart of the seemingly non-stop street party surrounding us.


Here are some highlights. The photos are from trips to the street while there was still sunlight. Things definitely cranked up later into the night, but my camera ceases to record events once the sun goes down.


When we weren't in the streets we were usually cooking. I brought some ingredients so Carlos and I could prepare fresh corn tortillas and a full on Mexican taco spread with refried beans and guacamole. Big hit. On another night it was chicken with Thai red curry sauce. And just to push it a bit further, I showed Carlos how to whip up a batch of homemade tofu and walked his niece and nephew through a batch of chocolate chip cookies.


After 10 days camping out at Carlos and Du's we said our farewells and returned to Niterói. Another Carnaval well played.